Work History

Andrew-Robb-Merseyside-Tile-Doctor

Welcome to my Work History archive where you will find detailed examples of Tile, Grout and Stone Cleaning and renovation work carried out within Merseyside.

Wood Effect Ceramic Tile Planks Grout Haze Renovation Birkdale

Removing Grout Haze from Wood Effect Ceramic Planks in Birkdale

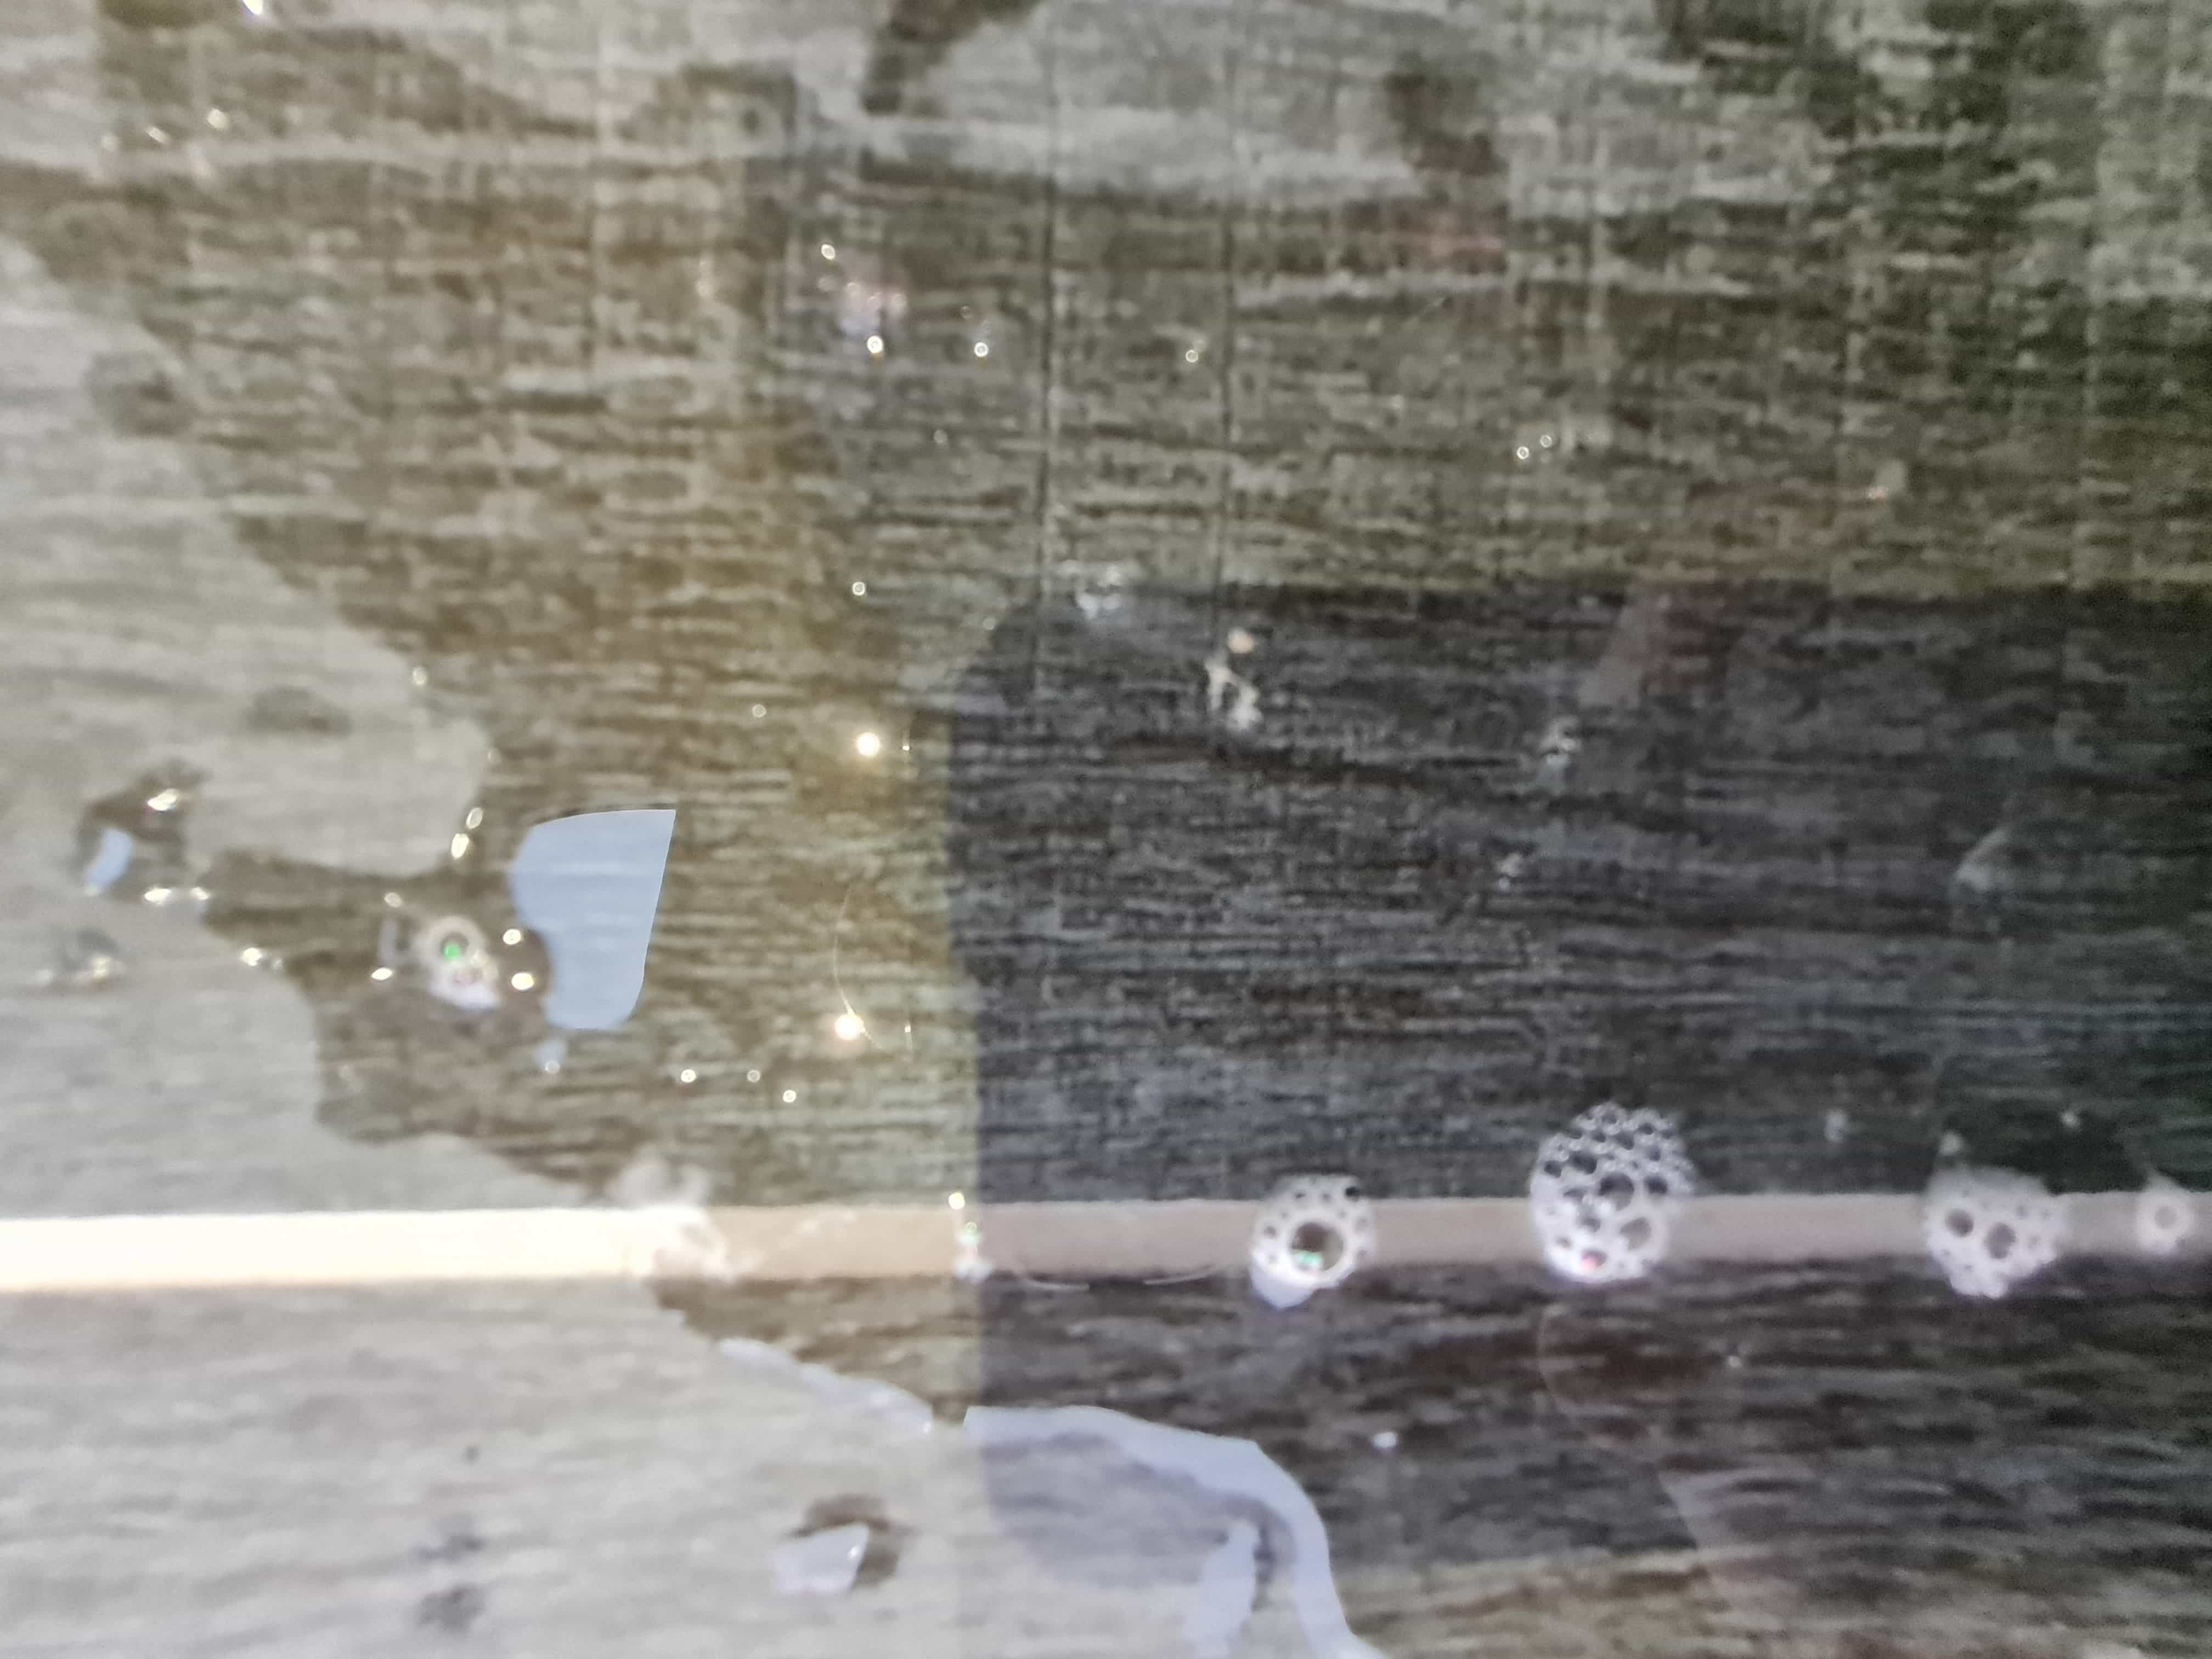
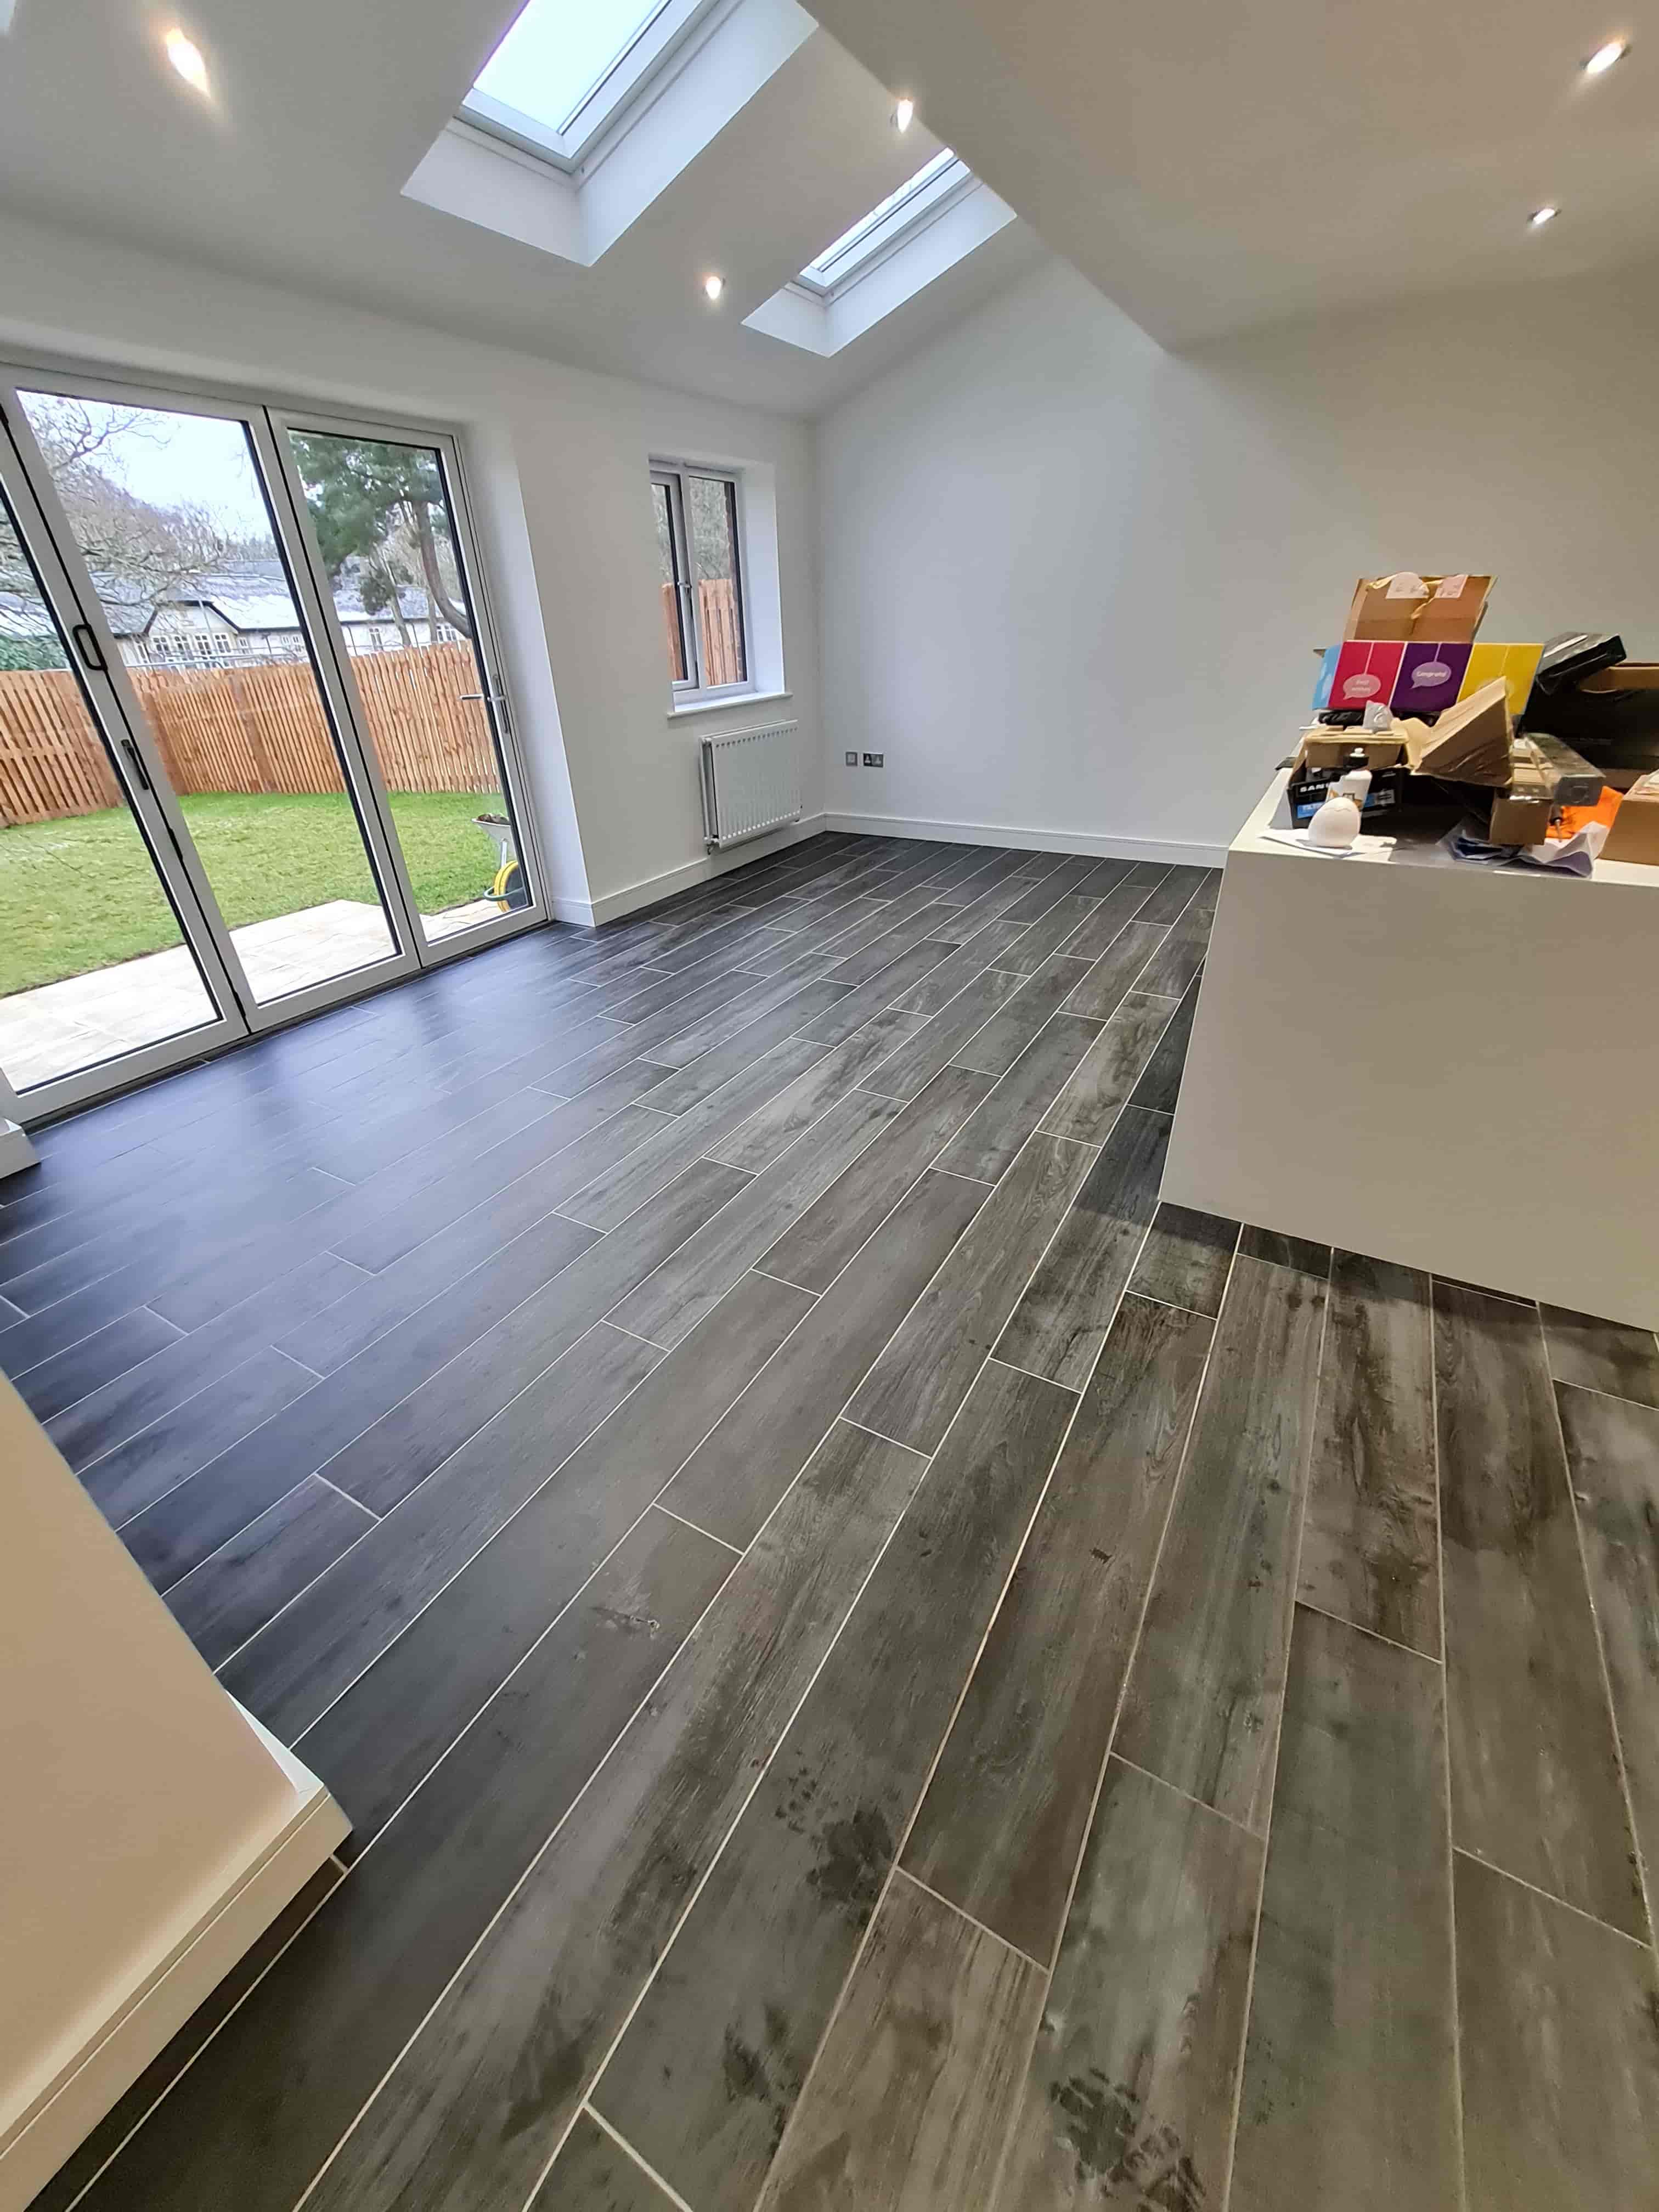
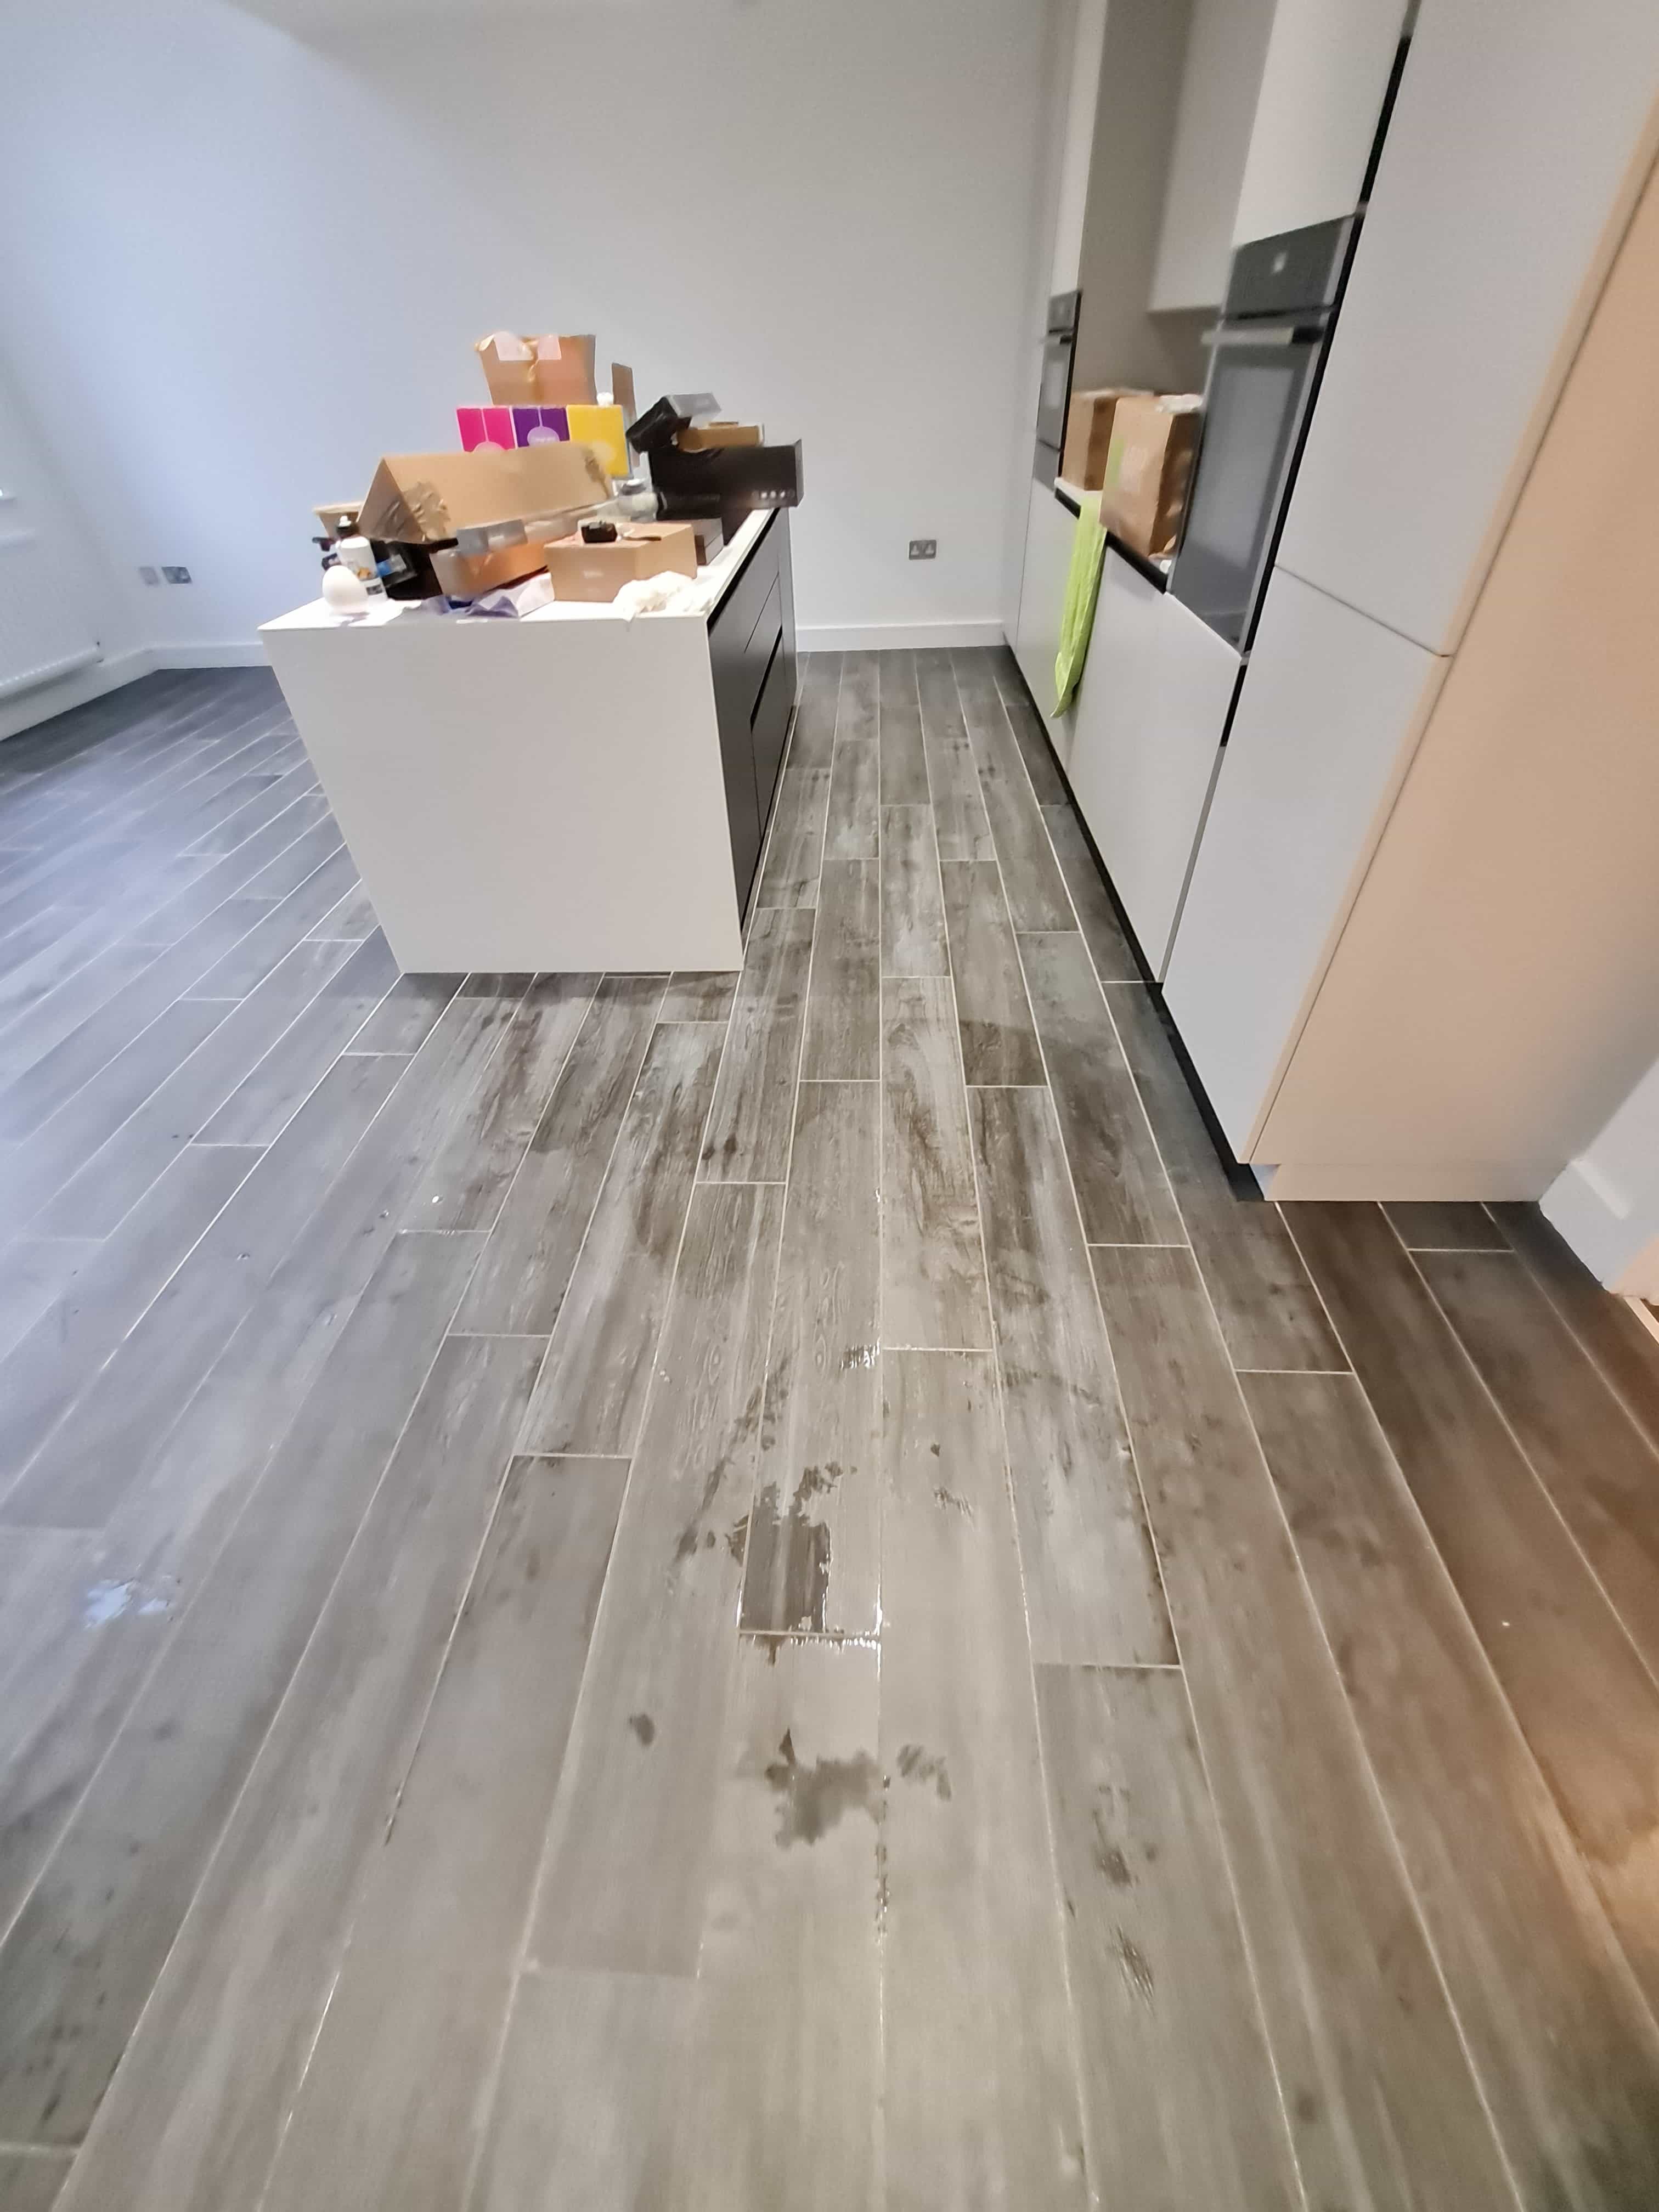
We were contacted by a property owner in Birkdale near Southport who recently had a large kitchen extension built with wood effect Ceramic tiles on the floor. Unfortunately, the builder struggled to remove all the grout from the tiles, and this left the floor in a bit of a state. Grout haze or grout smears as it is often called can be a huge problem when laying tiles, it needs to be polished off quickly after installation and even more so if your using a modern quick drying grout.

Wood Effect Ceramic Planks Birkdale Kitchen Floor Before Grout Haze Removal
This is quite a common problem, and we are often asked to resolve tile installation problems of one variety or another. Sometimes we can use an acid-based product such as Tile Doctor Acid Gel or Grout Clean-up which can break down the grout so it can be rinsed away and extracted. Modern polymer grouts which offer improved flexibility and adhesion are trickier and will require a different approach. I wouldn’t recommend the use of acidic products on natural stone however as it can etch the stone thereby causing more problems than it solves, fortunately these tiles were Ceramic.

I conducted a quick test with Grout Clean-up, and it responded well, so I could see removing the grout haze wasn’t going to be problem in this case.

Removing Grout Haze from Wood Effect Ceramic Tiles

I diluted one part Grout Clean-up with two parts water and mopped into onto the floor and left to dwell for a couple of minutes. The solution was then scrubbed into the tile using a buffing machine fitted with a black pad to loosen the grout haze adding more water as needed. The buffing machine was run over the floor once more and the liquids removed using a wet vacuum.

Wood Effect Ceramic Planks Birkdale Kitchen Floor During Grout Haze Removal
The ceramic tiles were then speed dried using floor fans so I could review the result and repeat the process where required. Once I was happy all the grout haze had been removed, I gave the floor dry buff with a white pad to remove any water marks and improve the final appearance.

Wood Effect Ceramic Planks Birkdale Kitchen Floor After Grout Haze Removal
The photographs really show the transformation once the grout was removed. Certainly my client was over the moon with the difference and the builder much relieved, I’m sure.


Professional Clean of a Wood Effect Ceramic Tiled Hallway in West Merseyside

Removing Grout Haze from Wood Effect Ceramic Planks in Birkdale Read More »

Starlight Quartz Tiled Kitchen Floor Cleaned Polished Southport

Achieving a Mirror Finish on Starlight Quartz floor tiles in Southport

We were asked by a client in Southport for advice regarding their Black Starlight Quartz tiled kitchen floor. Over the years it had lost its appearance and they wanted to know if anything could be done to return the deep shine the tiles had when they were installed.

Quartz tiles are not the most practical choice for the floor of a busy kitchen, but these sparkly starlight tiles certainly add the bling. In this case the deep sparkly shine added by the factory during manufacture had worn down with use and now looked almost cloudy.

Starlight Quartz Tiled Floor Before Cleaning Southport

Like Terrazzo, Quartz tiles are a composite tile engineered from a mixture of resin, sand, quartz, and crushed mirror pieces. The Quartz makes it very durable and tiles with high ratios of Quartz are very hard wearing although as in this case will benefit from a polish from time to time.

I paid the client a visit to survey the floor and work out the best process for restoring the appearance of the floor. I was confident the work could be done in a day and quoted accordingly. Happy with the price we agreed a date for my return.

Cleaning Starlight Quartz Floor Tile and Grout

The first job was to wash down the floor with a mild solution of Tile Doctor Pro-Clean to remove all the different products the client had used on the tiles to keep them clean. After ten minutes the solution was worked into the tiles with a floor buffer fitted with a black pad.

Buffing pads can struggle to reach into recesses of the grout line so I like to clean them manually with more Pro-Clean and a handheld scrubbing brush. The combination of the Pro Clean and scrubbing action releases the dirt making the solution turn into a dark slurry that is rinsed with water and extracted with a wet vacuum. The floor is then inspected, and the process repeated where necessary and afterwards two floor driers were placed on the floor to speed up the drying time.

Polishing and Sealing a Starlight Quartz Tiled Kitchen Floor

The Quartz tiled floor was then dry burnished using a standard speed buffing machine fitted with a Tile Doctor 3000-grit burnishing pad and a little water sprayed onto the tile. This process slowly builds back the polish on the tile.

Then once the deep shine had been restored to the Quartz tiles the floor was sealed with two coats of Tile Doctor Ultra-Seal impregnating sealer, the sealer is absorbed into the microscopic pores and will protect the tiles and grout going forward. The excess sealer was wiped off and then I ran over the floor with a White buffing pad to tighten up the seal and to further improve the finish on the tiles until it was like a mirror.

Starlight Quartz Tiled Floor After Cleaning Polishing Southport

Before leaving I advised the client that they needed to be careful what they used to clean their floor with going forward, some supermarket products are simply too strong and will strip the protective seal off a tile. For this floor I recommended Tile Doctor Stone Soap which is designed for cleaning highly polished floors and helps to maintain the patina.

They were delighted with the newly polished floor it really returned the wow factor back to the kitchen.


Professional Renovation of a Starlight Quartz Tiled Kitchen Floor in Merseyside
Achieving a Mirror Finish on Starlight Quartz floor tiles in Southport Read More »

Victorian Hallway Floor Tile Renovation West Kirby Merseyside

Victorian Tiled Hallway Renovated in West Kirby

We were contacted by a customer in West Kirby who needed help renovating a Victorian tiled hallway in a house they had just purchased. Kirby is a desirable seaside location North of Heswall that expanded with the arrival of the railway in 1848. The railway brought a demand for property and so it’s not unusual to find housing stock in this area dating back to the Victorian era.

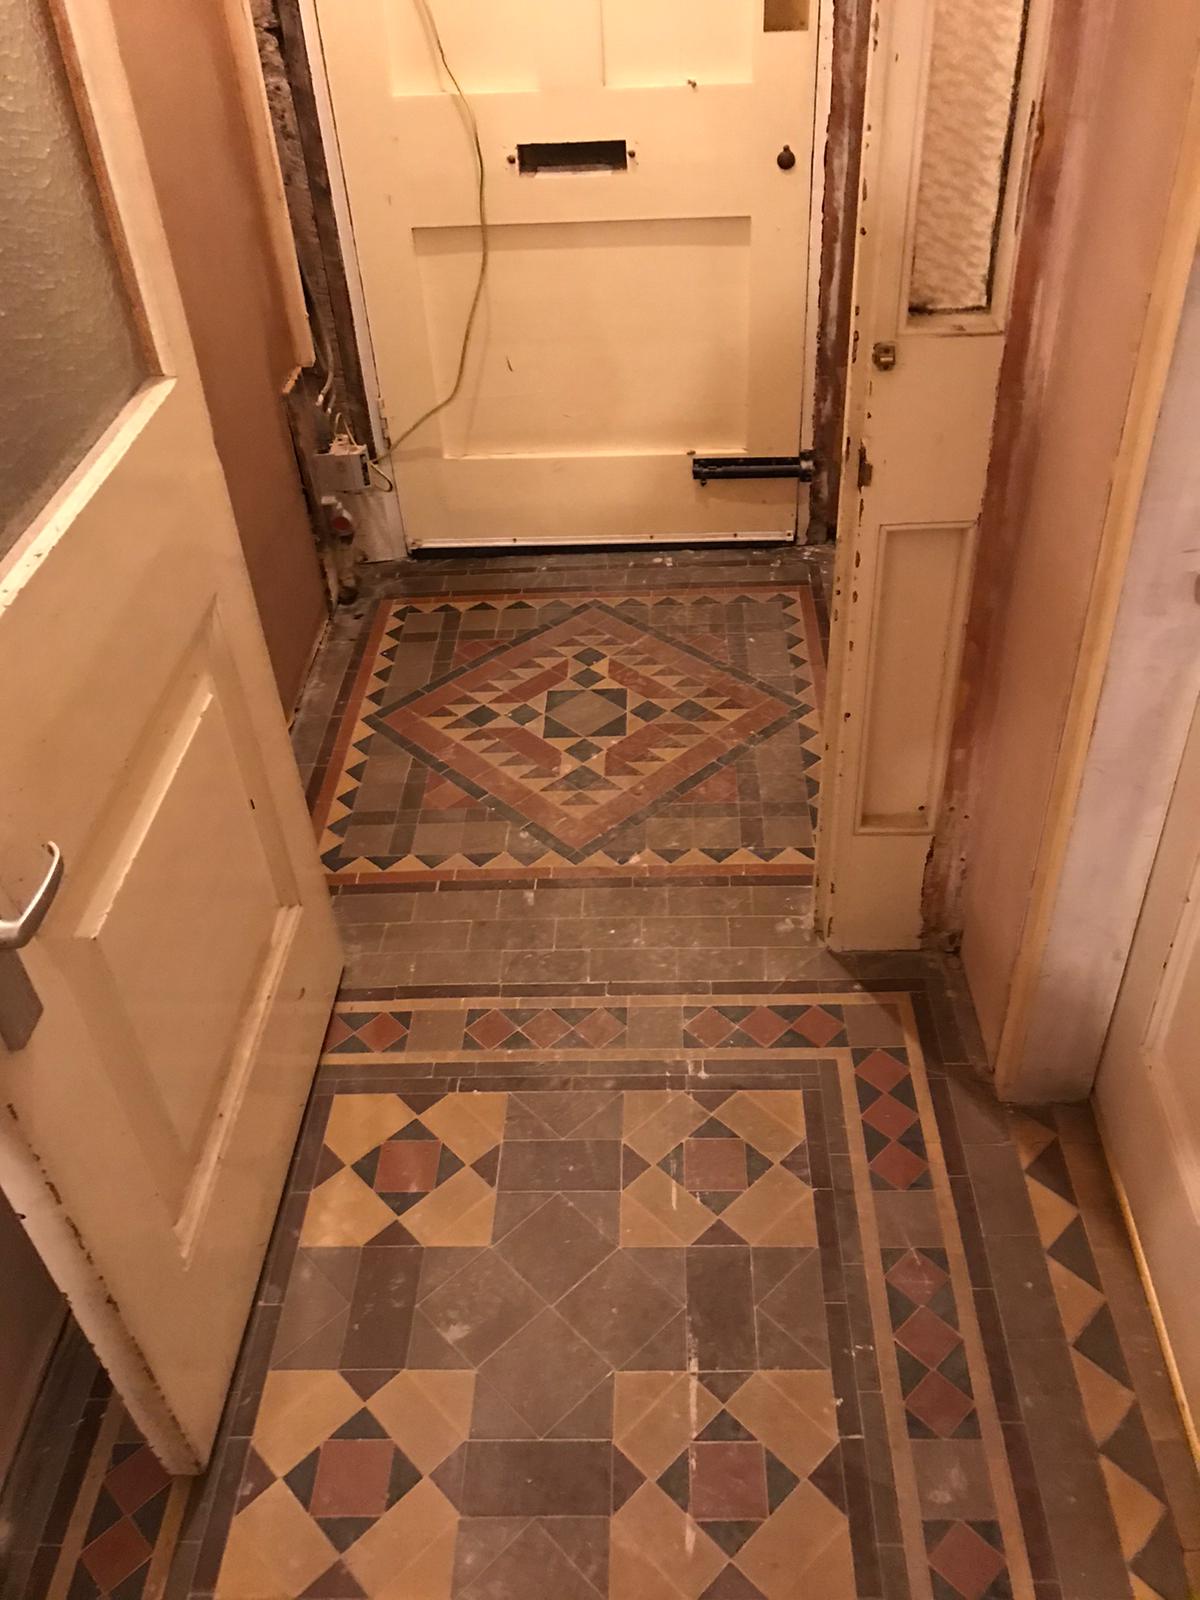
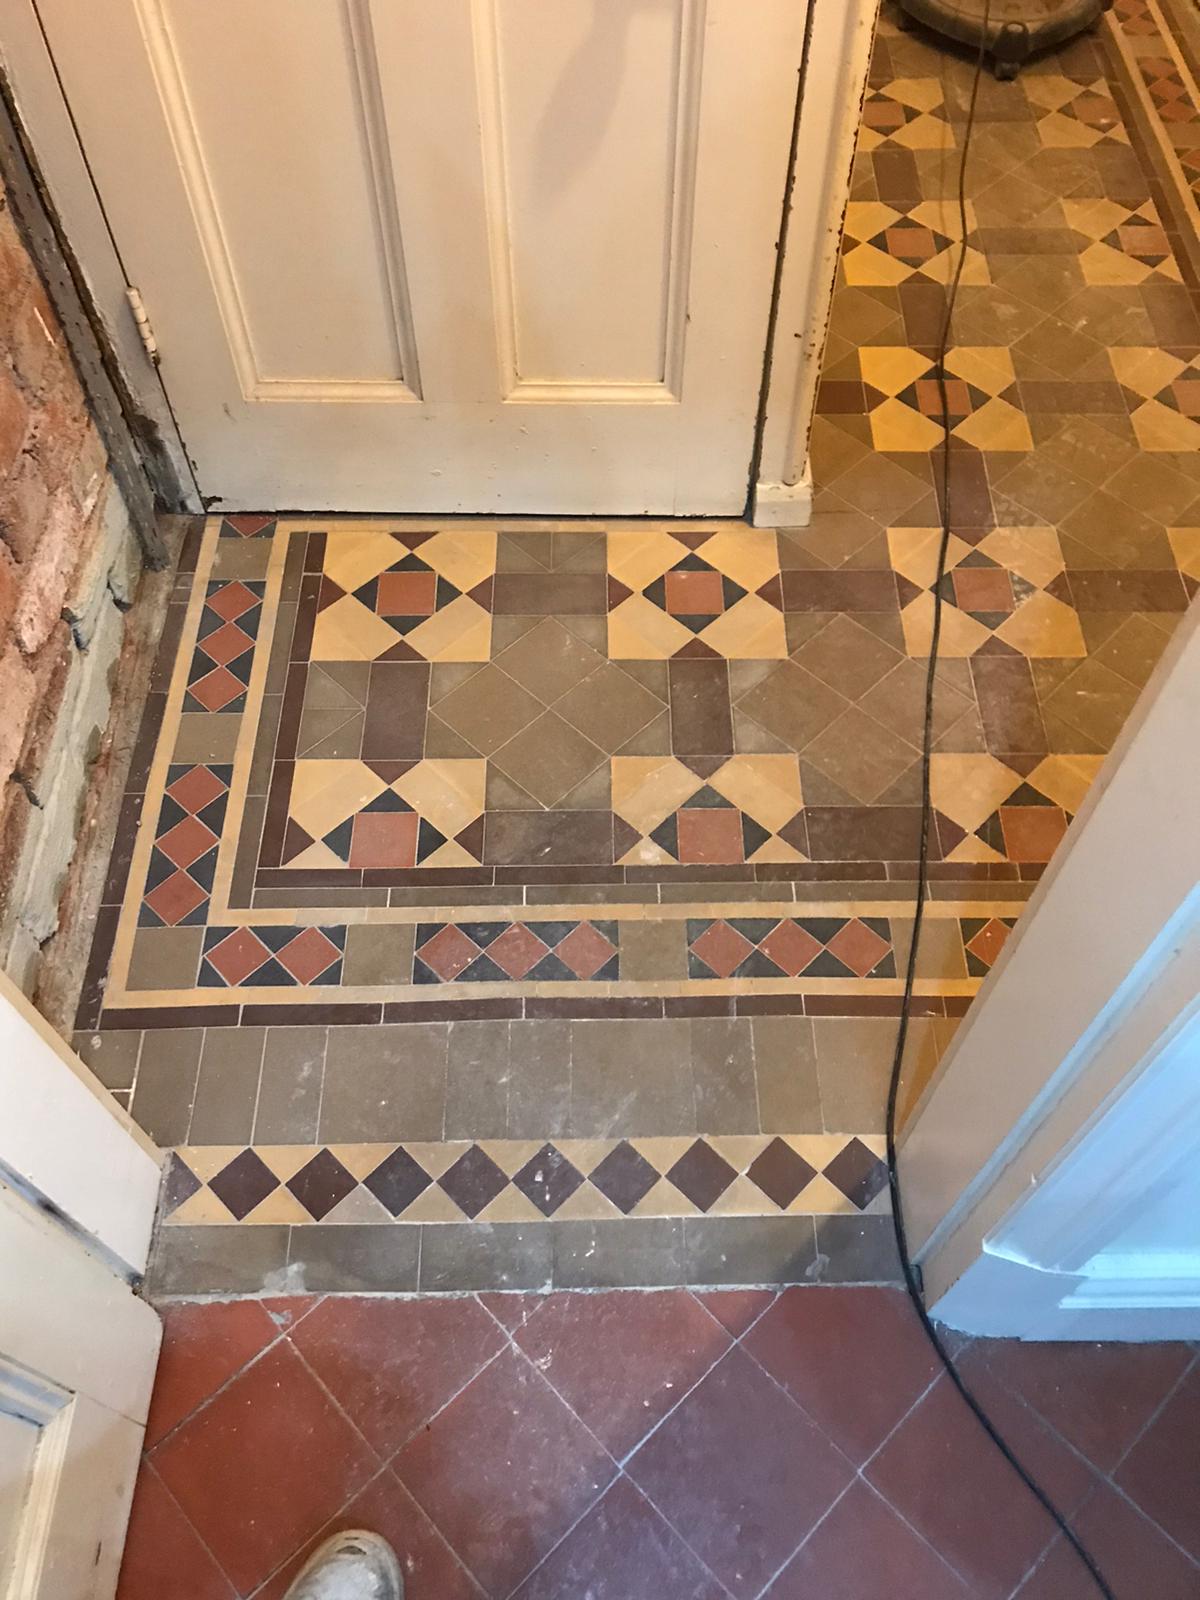
Victorian Tiled Hallway Before Renovation West Kirby

The Victorian tiles at this property appear to have been neglected by the previous owner and were now looking very dull and marked by paint from decorating; all the colours looked washed out and the floor was now looking very unappealing.

Victorian Tiled Hallway Before Renovation West Kirby

The good news however is that this problem is not uncommon and with a deep clean and a fresh sealer applied it can be transformed. I gave the owner a quote which was accepted a date agreed for my return to do the work.

Victorian Tiled Hallway Before Renovation West Kirby

Deep Cleaning a Victorian Tiled Hallway Floor

On the first day the floor was sprayed with a neat solution of Tile Doctor Remove and Go which is a powerful alkaline cleaning and stripping agent used to remove old seals and paint. The solution was left to dwell for about twenty minutes so it could soak in and get to work. It was then scrubbed into the tiles using a coarse 200-grit pad fitted to a heavy buffing machine. Water was then added to the floor for lubrication and the soils released from the pores of the tile during scrubbing was removed by with a wet vacuum.

To treat the stubborn paint stains and remains of what I suspect was carpet adhesive a hand scraper and wire brush was used, this was made easier by the Remove and Go which had softened the paint etc.

The next stage was to give the Victorian tiles a mild acid wash using Acid Gel which is applied to the floor, scrubbed in, and rinsed off with a little water then extracted using the wet vacuum. We always recommend an acid wash for old floors like these as it will counter any efflorescent salts resident in the tiles and helps to remove other mineral contaminates and old grout that can mask the true beauty of the tiles.

Sealing a Victorian Tiled Hallway Floor

I left the tiles to dry out for two days before returning to apply the sealer, first checking it was dry by testing for moisture in various places with an electronic damp tester. It’s not a good idea to apply a sealer to a damp floor so we always check first.
Satisfied the floor was dry, I started applying a coat of Tile Doctor Colour Grow which is a colour enhancing impregnating sealer that helps to bring out the true colours in the tile. This was allowed to dry for thirty minutes and then followed up five coats of Tile Doctor Seal and Go Extra which is a breathable sealer that leaves a lovely satin finish and builds on the protection.

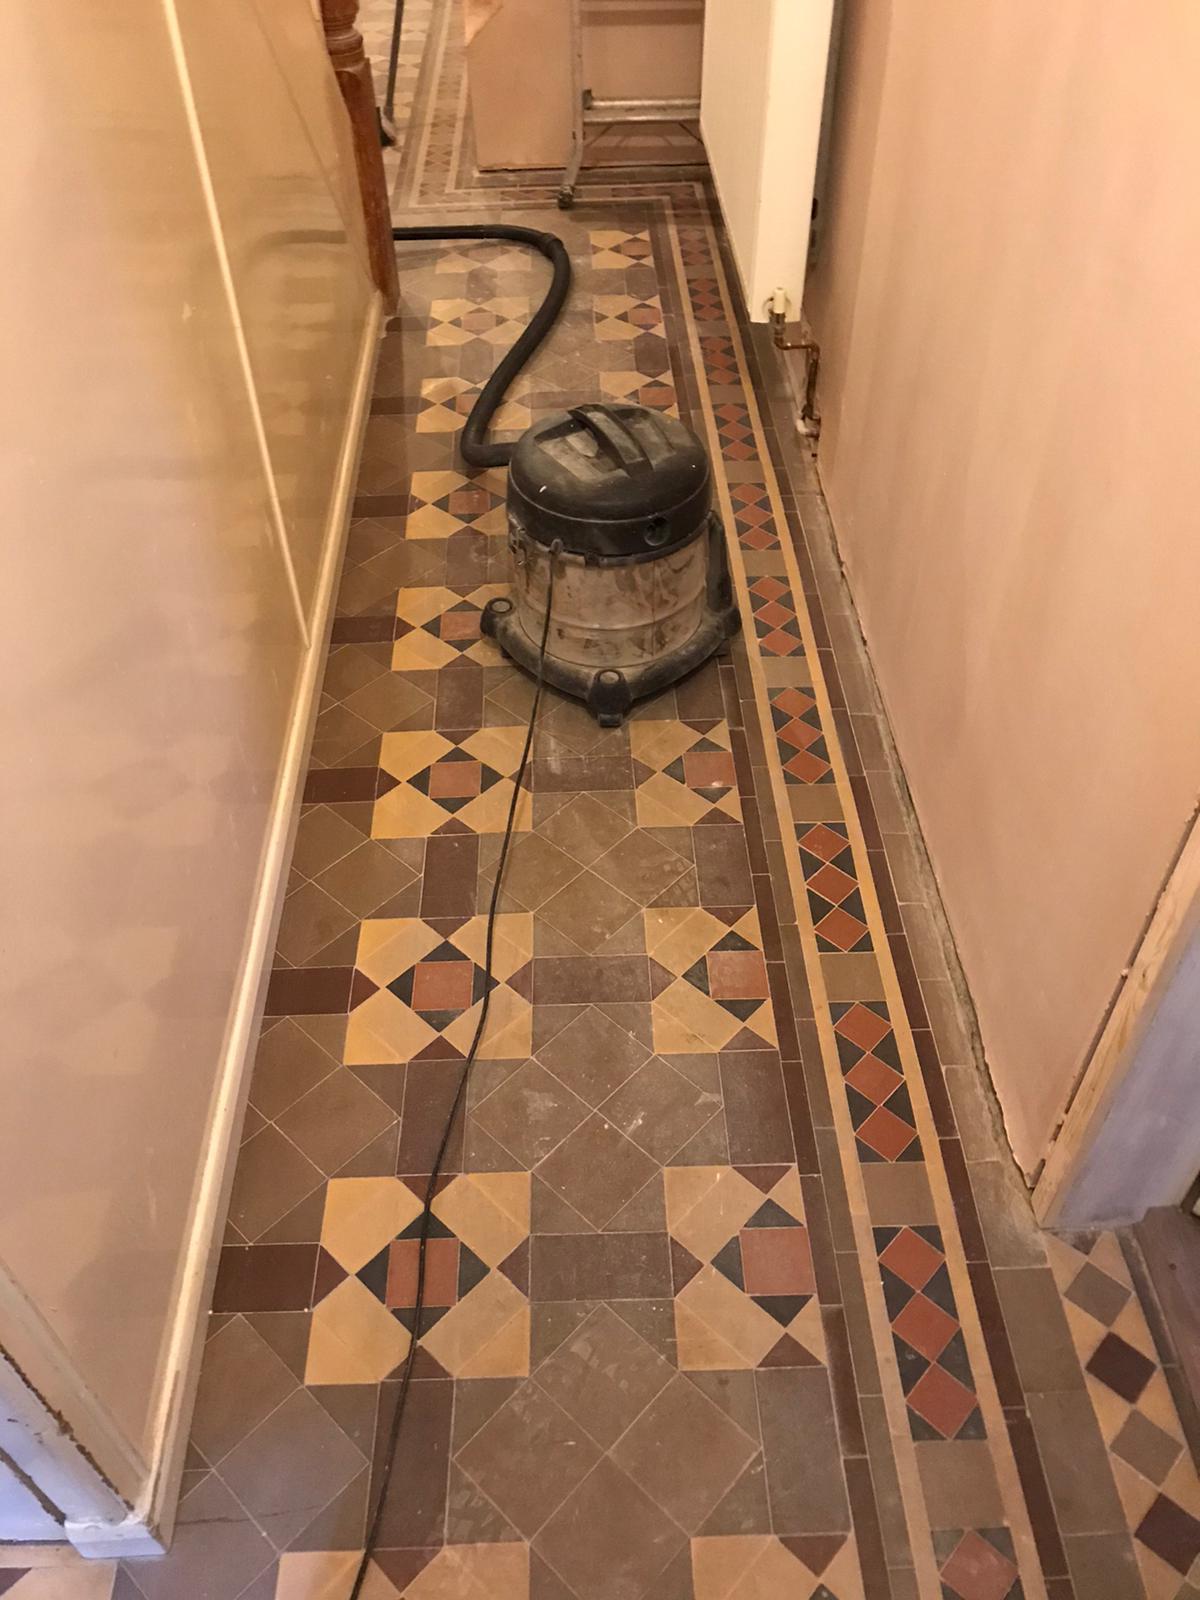
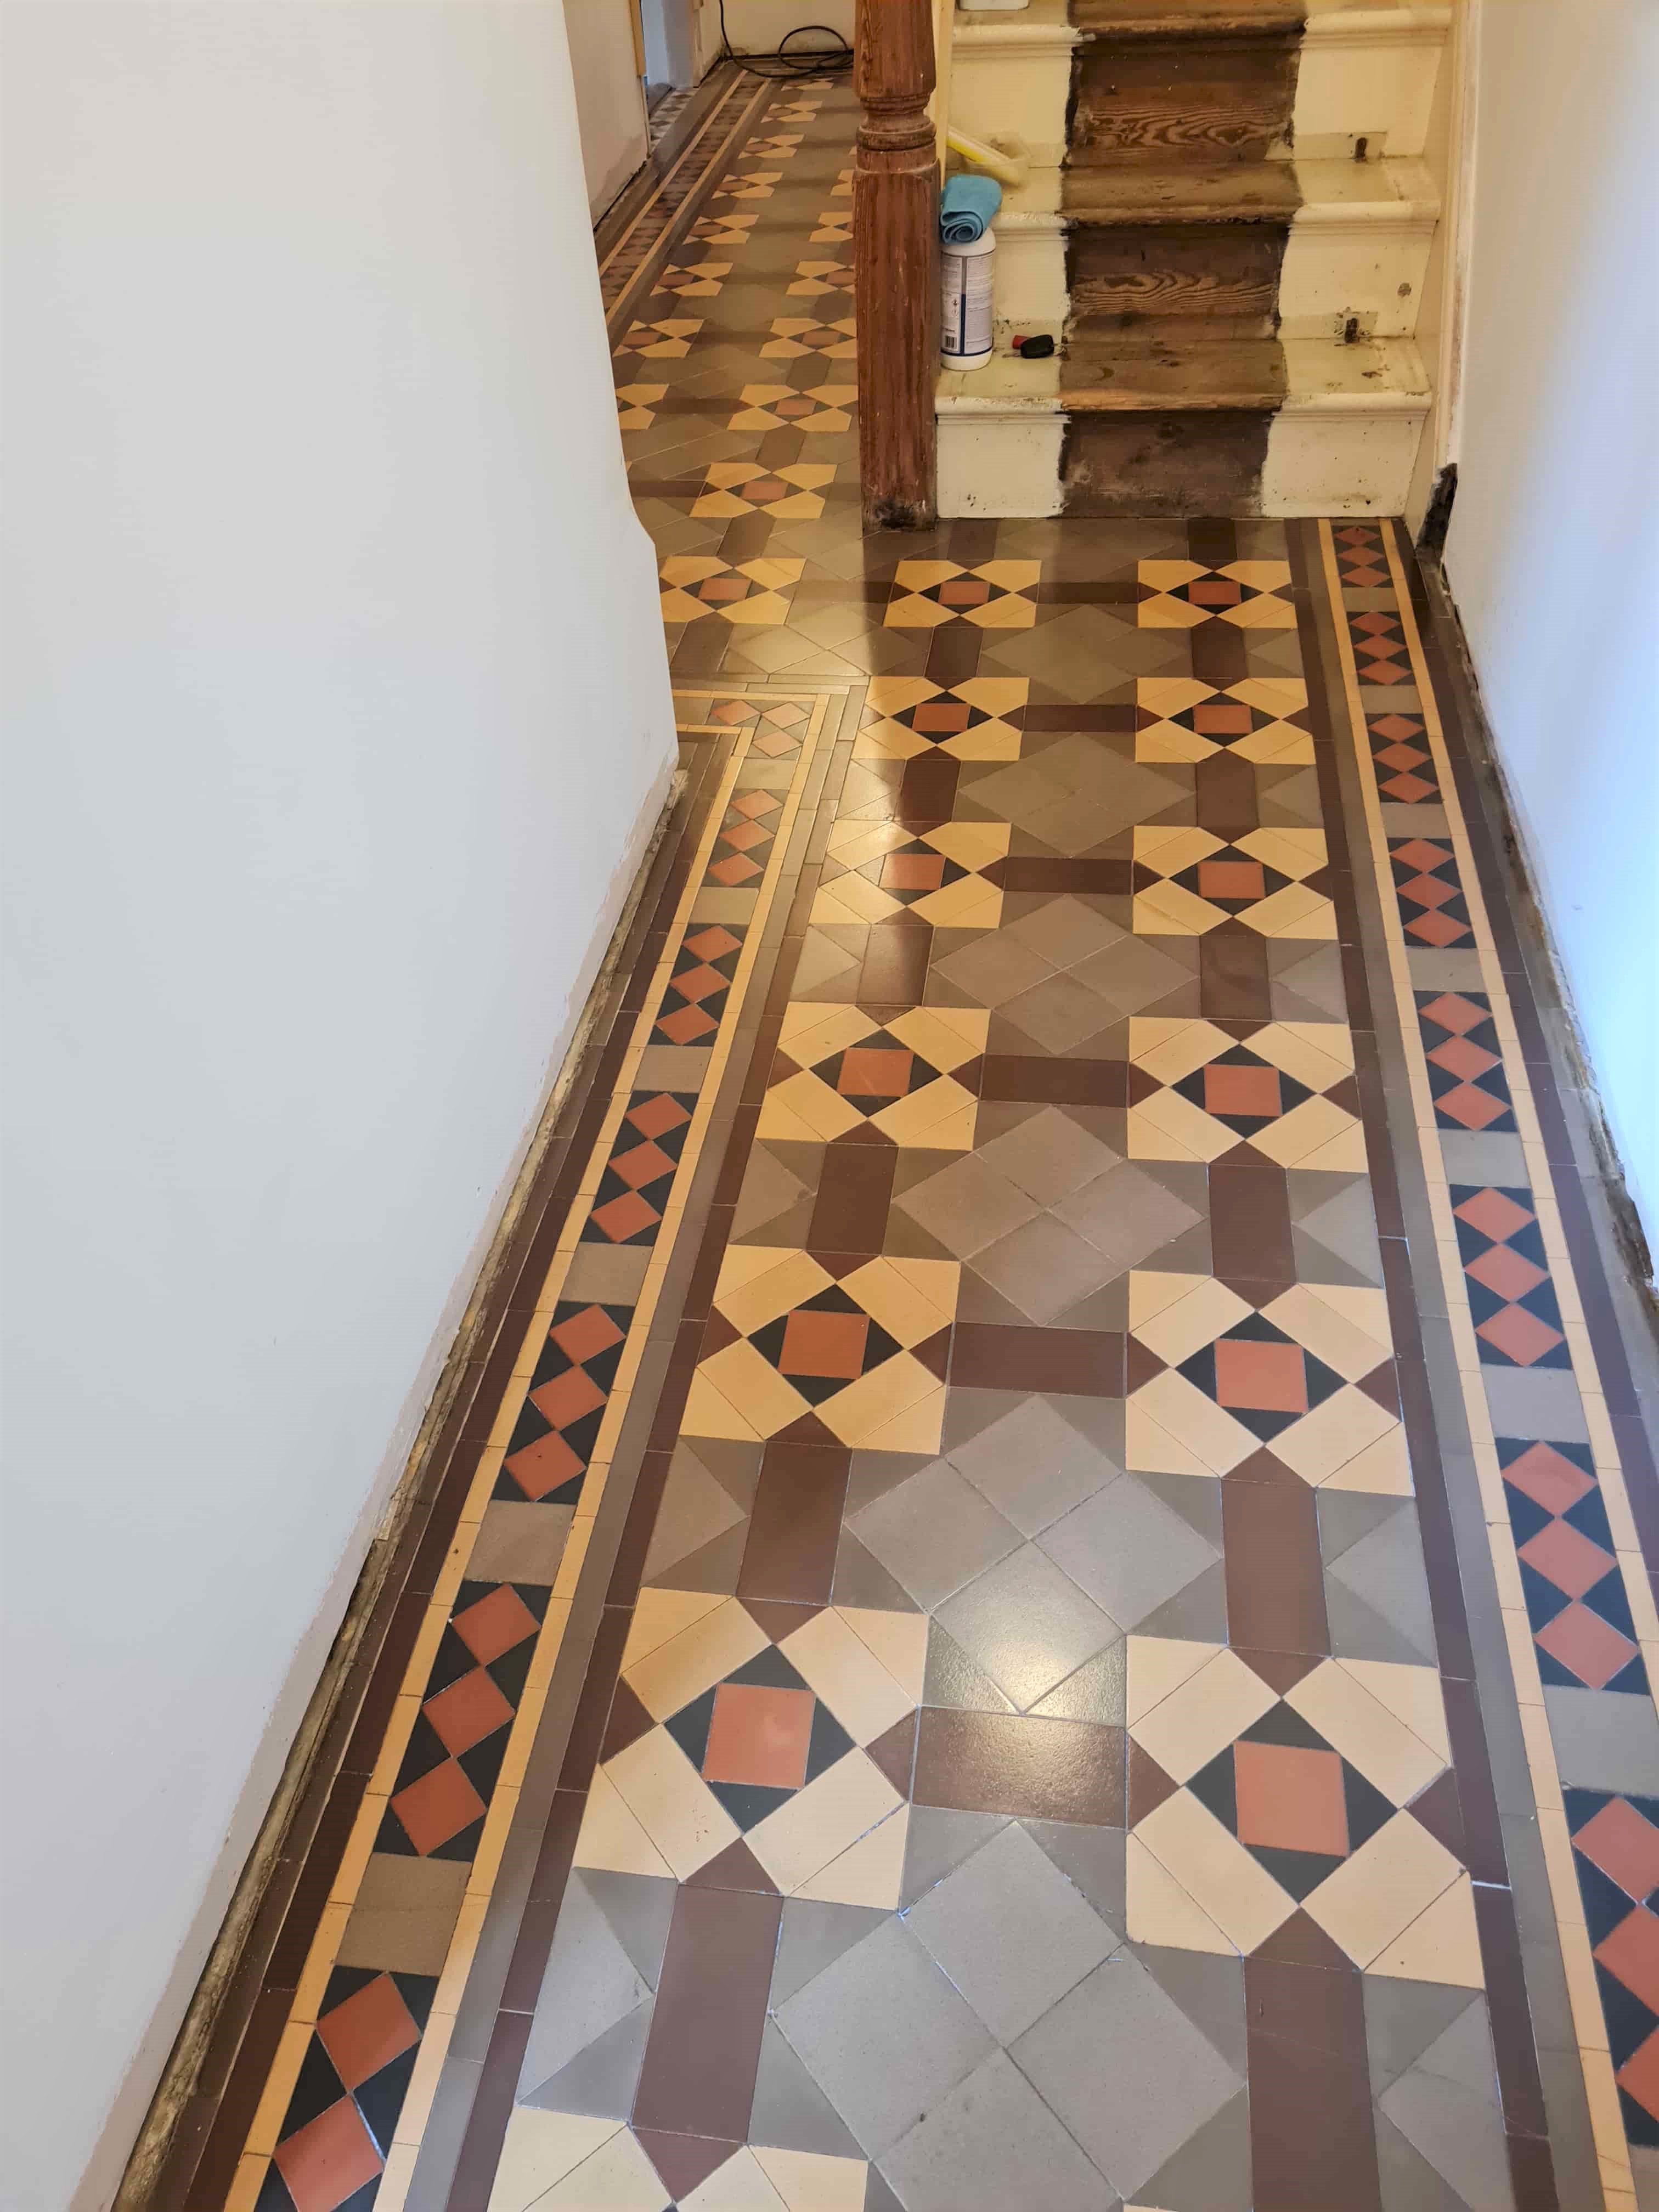
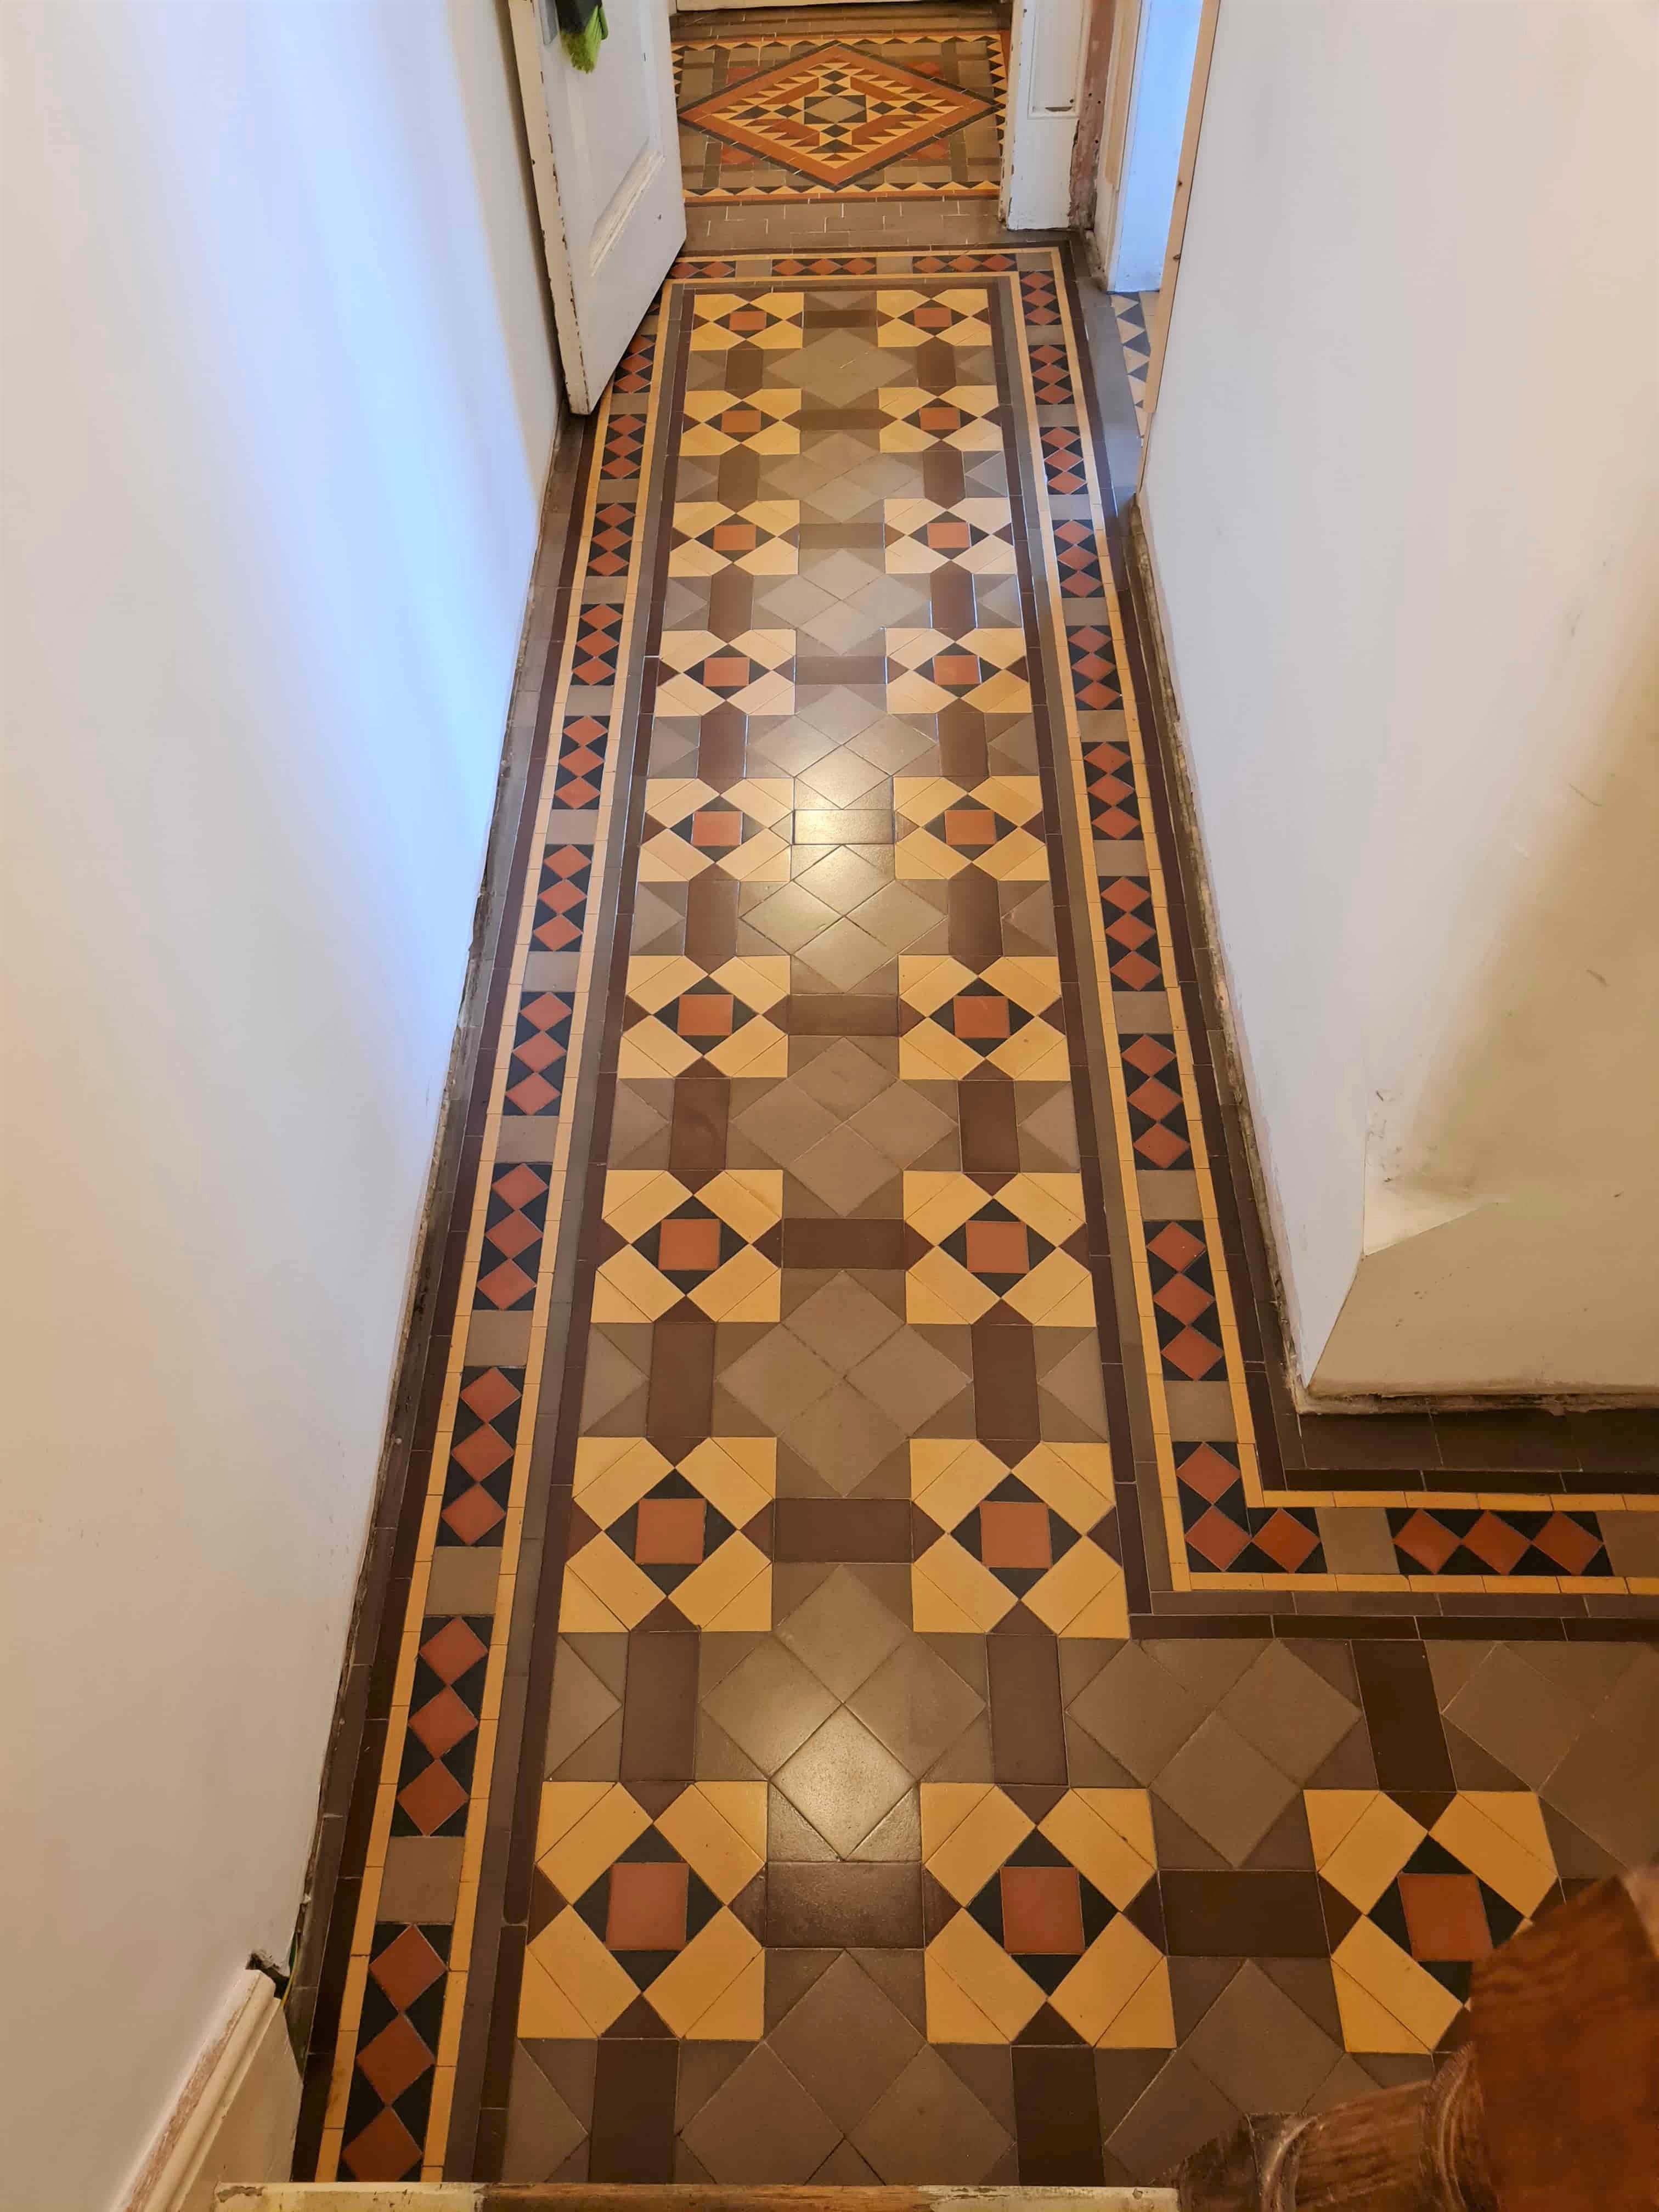
Victorian Tiled Hallway After Renovation West Kirby

Once done the Victorian hallway tiles looked so much cleaner and healthier. It was quite a transformation and the new sealer had given the floor a nice low sheen shine which the customer was very happy with.

Victorian Tiled Hallway After Renovation West Kirby

For aftercare cleaning I left them with a bottle of Tile Doctor Neutral Cleaner which is specially formulated for cleaning sealed tiles. We don’t recommend tile cleaning products you find on supermarket shelves as the are usually too strong and can strip a sealer off the floor prematurely. If your choosing another product to clean your floor always read the label to make sure its compatible.


Victorian Hallway Floor Deep Cleaned and Sealed in Merseyside

Victorian Tiled Hallway Renovated in West Kirby Read More »

Quarry Tiled Floor Restoration Formby

Restoring a Cement Covered Tiled Floor in Formby

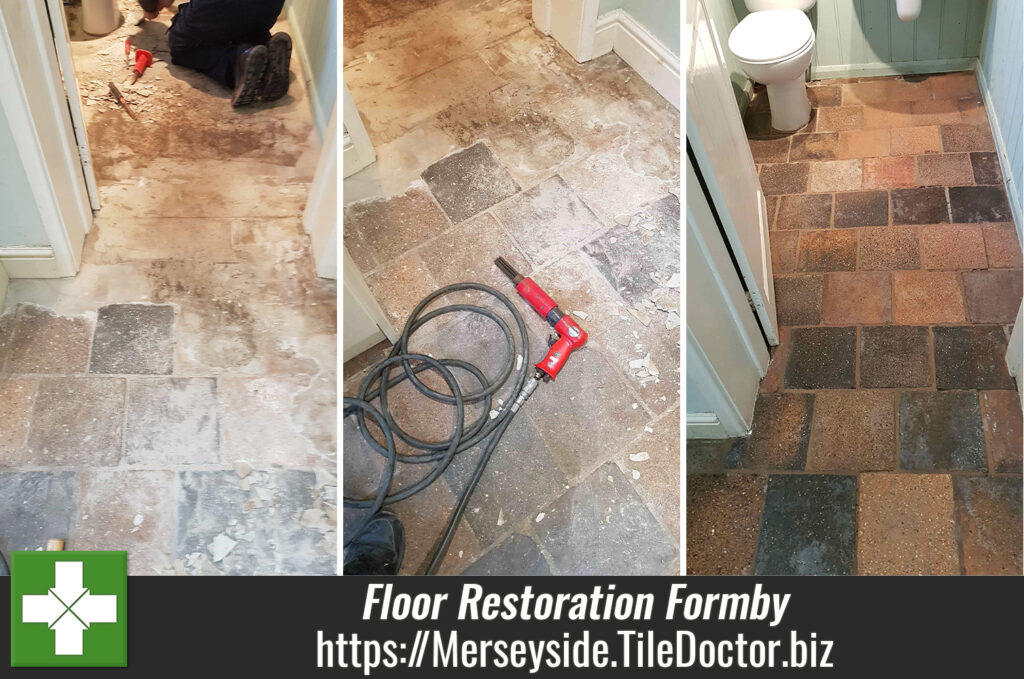
We were contacted by a client from Formby asking for advice on how to remove a thick layer of floor leveller from her Quarry tiled floor. I suspect at some point in the past a previous owner had decided to cover the tiles with lino and a cement-based levelling compound was applied to level the floor first. My client had tried to remove it herself but found it very hard going and after realising she had quite a project on her hands decided to call us instead and see if we could help with the restoration.

Quarry Tiled Floor During Self-Levelling Compound Removal Formby

I worked out a quote for the client which would include removing the self-levelling compound, cleaning up the tiles and then sealing them to improve its appearance and protect it going forward. The quote was accepted, and a date agreed for the restoration to be completed which would take two days.

Cleaning and restoring a Stone Tile Kitchen Floor

We have a variety of tools that we can use for removing cement but in this case, I decided to use an air operated pin gun. The head of the gun has long pins of different length which are fired at the floor gently chipping away at the floor compound, this made short work of breaking up the cement so it could be swept away. A lot easier than the method the client had previously tried.

Quarry Tiled Floor During Self-Levelling Compound Removal Formby Quarry Tiled Floor During Self-Levelling Compound Removal Formby

With the floor clear of cement, it was given an acid wash with Tile Doctor Acid Gel scrubbed in with a buffing machine fitted with a black pad. The acidic formula cleans up the stone of old cement including fine particles of dust. Afterwards the gel was rinsed off the floor with water and extracted with a wet vacuum.

Sealing a Stone Tiled Kitchen Floor

We let the floor dry out overnight and returned the next morning to apply the sealer. For the best results, the stone needs to be dry so before sealing I always take several moisture readings with a damp meter to make sure. The results were good so the first of what would be three coats of sealer were applied to the floor. I used Tile Doctor Colour Grow for sealing, it is an impregnating sealer that works by occupying the pores in the store thereby protecting it from within, it also brings out the colour in the stone.

Once done the floor looked great, the old self-levelling compound was gone and the rich colours in the tile had been restored. In fact is was only when finished did we realise these were in fact Baked Clay Quarry Tiles, minerals are added during manufacturing to give then colour, although 95% clay they are very tough like stone. The client was over the moon with the outcome, the floor had been restored to its’ former glory.

Quarry Tiled Floor After Self-Levelling Compound Removal Formby

For aftercare I recommended the use of Tile Doctor Neutral Tile Cleaner to keep the floor in good condition. It is pH neutral so will ensure the newly applied sealer is not compromised and the floor will continue to look good for a long while to come.


Professional Restoration of a Tiled Floor in Merseyside

Restoring a Cement Covered Tiled Floor in Formby Read More »

Victorian Tiled Porch Before After Cleaning Liverpool

Victorian Tiled Porch Deep Cleaned at Cressington Parks Liverpool

Cressington Parks is a 19th Century gated private estate built for wealthy merchants who needed easy access to the city of Liverpool. Cressington has been designated a conservation area with many examples of period street furniture including gas lamps, gates and railings along with all the period buildings. In fact, the streets have been used for many television and film sets.

As you can see from the picture below this small but impressively intricate Victorian Tiled floor was in need of some love and care after being covered in carpet for many years and we were asked to do the renovation. We have restored several period floors in the conversation area where we find the properties are popular with younger family’s buying the homes for restoration.

Victorian Tiled Porch Floor Before Cleaning Cressington

Cleaning/Repairing a Victorian Tiled Porch Floor

This particular floor was at the servants’ entrance to the main house and required deep cleaning and a few repairs to be carried out. Given the small size of the floor we were aiming to complete the job within a day by using low moisture cleaning techniques.

The first task was to remove as much of the old coatings which included carpet glue, paint and varnish using very sharp scrapers. Once this was done, we covered the floor with Tile Doctor Acid Gel. Being in gel form it’s very easy to control and means it will stay in in place where a liquid treatment would just run away. After leaving the gel to dwell for ten minutes, we used a slow speed buffing machine fitted with extra weight and a black scrubbing pad to work the product into the tiles. This now soiled gel was then rinsed off with a little water and extracted using a wet vacuum. When we use this cleaning method the acid gel cleans the floor and helps counter alkaline salts inherent in the floor.

Whilst the floor was drying, we turned our attention to the damaged tiles which we replaced with matching tiles that we had sourced earlier. It takes some time to do this as you need to scrape out the surrounding grout, lever out the broken tile and then scrape out the adhesive. The new tile is then set in place with rapid set adhesive and matching grout.

Once that had set the rest of the floor was encouraged to dry out faster with the use of heat guns for about twenty minutes before letting the floor cool down. At this stage the floor was looking much improved!

Sealing a Victorian Tiled Porch Floor

After a further twenty minutes we did a damp test using a damp meter to make sure the floor was ready for sealing. The minimal use of liquids and added heat had worked well and we were able to move on and seal the tiles starting with a single coat of Tile Doctor Colour Grow which is an impregnating fully breathable sealer that brings out the colour in the tile.

The first coat was left to dry for forty minutes before following with three coats of Tile Doctor Seal and Go Extra. This is also a breathable sealer and is ideal for situations where no damp proof membrane. The Sealer left the floor with a lovely sheen and the colourful tiles really shone through. The floor was back to its’ former glory.

Victorian Tiled Porch Floor After Cleaning Cressington

Our customer was over the moon and has asked us if we could return to restore the outside pathways, what better feedback can you get.


Professional Restoration of a Victorian Tiled Porch in Liverpool

Victorian Tiled Porch Deep Cleaned at Cressington Parks Liverpool Read More »

Travertine Tabletop Before and After Polishing Heswall

Polishing a Travertine Table Top in Heswall

One of my customers for who I recently polished their Marble floor was over the moon with the results and wondered and if I could achieve the same effect with a Travertine table which had many scratches to the top. The table was at his house in Heswall which is located on the Wirral, on the Eastern side of the Dee Estuary with lovely views across the river towards North Wales.

Travertine Tabletop Before Polishing Heswall Wirral

The table was a lovely piece of stone furniture, but I could see it was badly marked, scratched and had lost much of its surface sheen. Whilst this was a slightly unusual request, the polishing process works equally well on any type of stone so apart from the physical issue of working on a raised surface, I couldn’t see a problem with working on the table and anticipated that it would come up quite well. We agreed a cost and I arranged a time to come back and complete the job.

Travertine Tabletop Before Polishing Heswall Wirral

Cleaning and Polishing a Travertine Table

When polishing floor tiles, I would normally use large Tile Doctor 17-inch diamond encrusted burnishing pads fitted to a rotary floor buffer, naturally that simply wouldn’t work on a table however, I do have a small hand-held buffing machine that’s perfect for getting into small spaces and polishing stone wall tiles which would be perfect for this situation.

To restore the polished finish on the table I was able to use the hand buffer together with a set of four 6-inch diamond encrusted burnishing pads of different grits from coarse to very fine. The process involves working through the pads in sequence. I started the polishing with the coarse 400-grit pad and a little water, this coarse pad removes the scratches and ingrained dirt. The table was rinsed down and then the 800-grit medium pad was applied which is the first step in the polishing process. Again, this pad is applied with water to lubricate and the table was rinsed down afterwards. The process was repeated with the 1500-grit fine pad and then the 3000-grit very fine pad to bring up a really nice shine to the Travertine table, I should mention the last pad is applied dry with only a tiny amount of water sprayed onto the surface.

Sealing a Travertine Table

The last step was to seal the stone to protect it going forward for which I used two coats of Tile Doctor Colour Grow. The sealer is rubbed into the top then the excess polished off after ten minutes. Once the sealer was dry the table surface was then buffed with a white pad to bring up the finish even further.

Travertine Tabletop After Polishing Heswall Wirral

The client was really pleased with the result, the table looked like new; he was so glad he had asked me to look at it following the work on his floors. Before leaving I talked to him about the best way to look after his table in the future and recommended for regular cleaning that he use Tile Doctor Stone Patina Spray which has been especially formulated for the regular cleaning of stone worktops.

Travertine Tabletop After Polishing Heswall Wirral


Professional Restoration of Travertine Table East Cheshire

Polishing a Travertine Table Top in Heswall Read More »

Cleaning an Old Terracotta Tiled Kitchen Floor in Runcorn

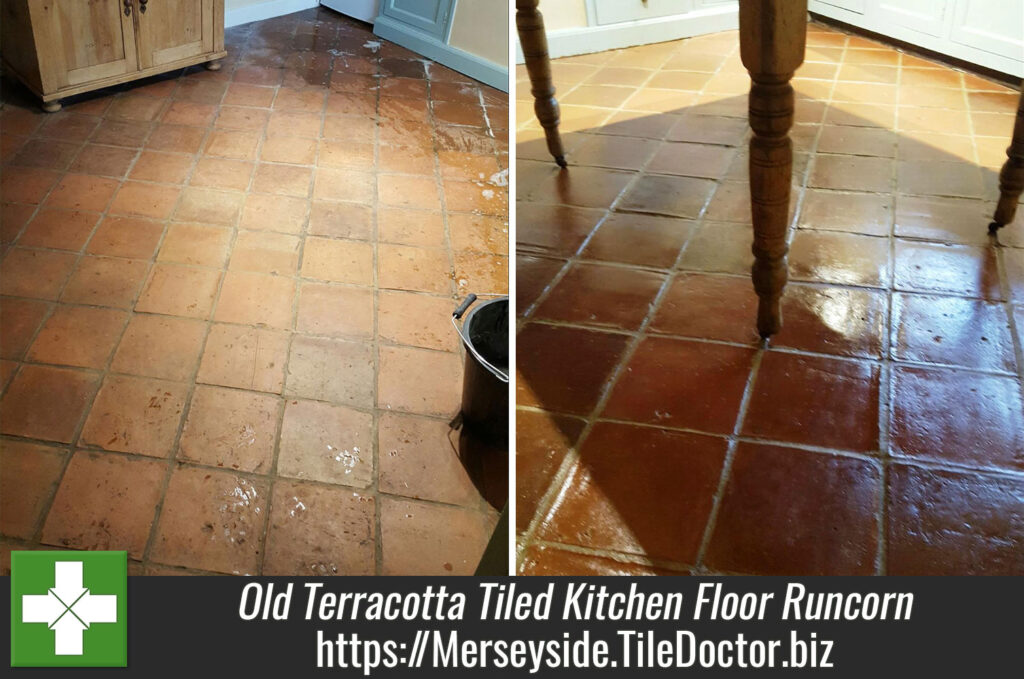
This post comes from a job I did for a customer in who lives in the town of Runcorn on the south bank of the River Mersey. The request was to restore the Terracotta floor tiles in the kitchen of a property which dated back to 1773 and still had all its original features inside and out. You can see from the photograph below that the tile and grout were looking very dull and well overdue a deep clean and seal.

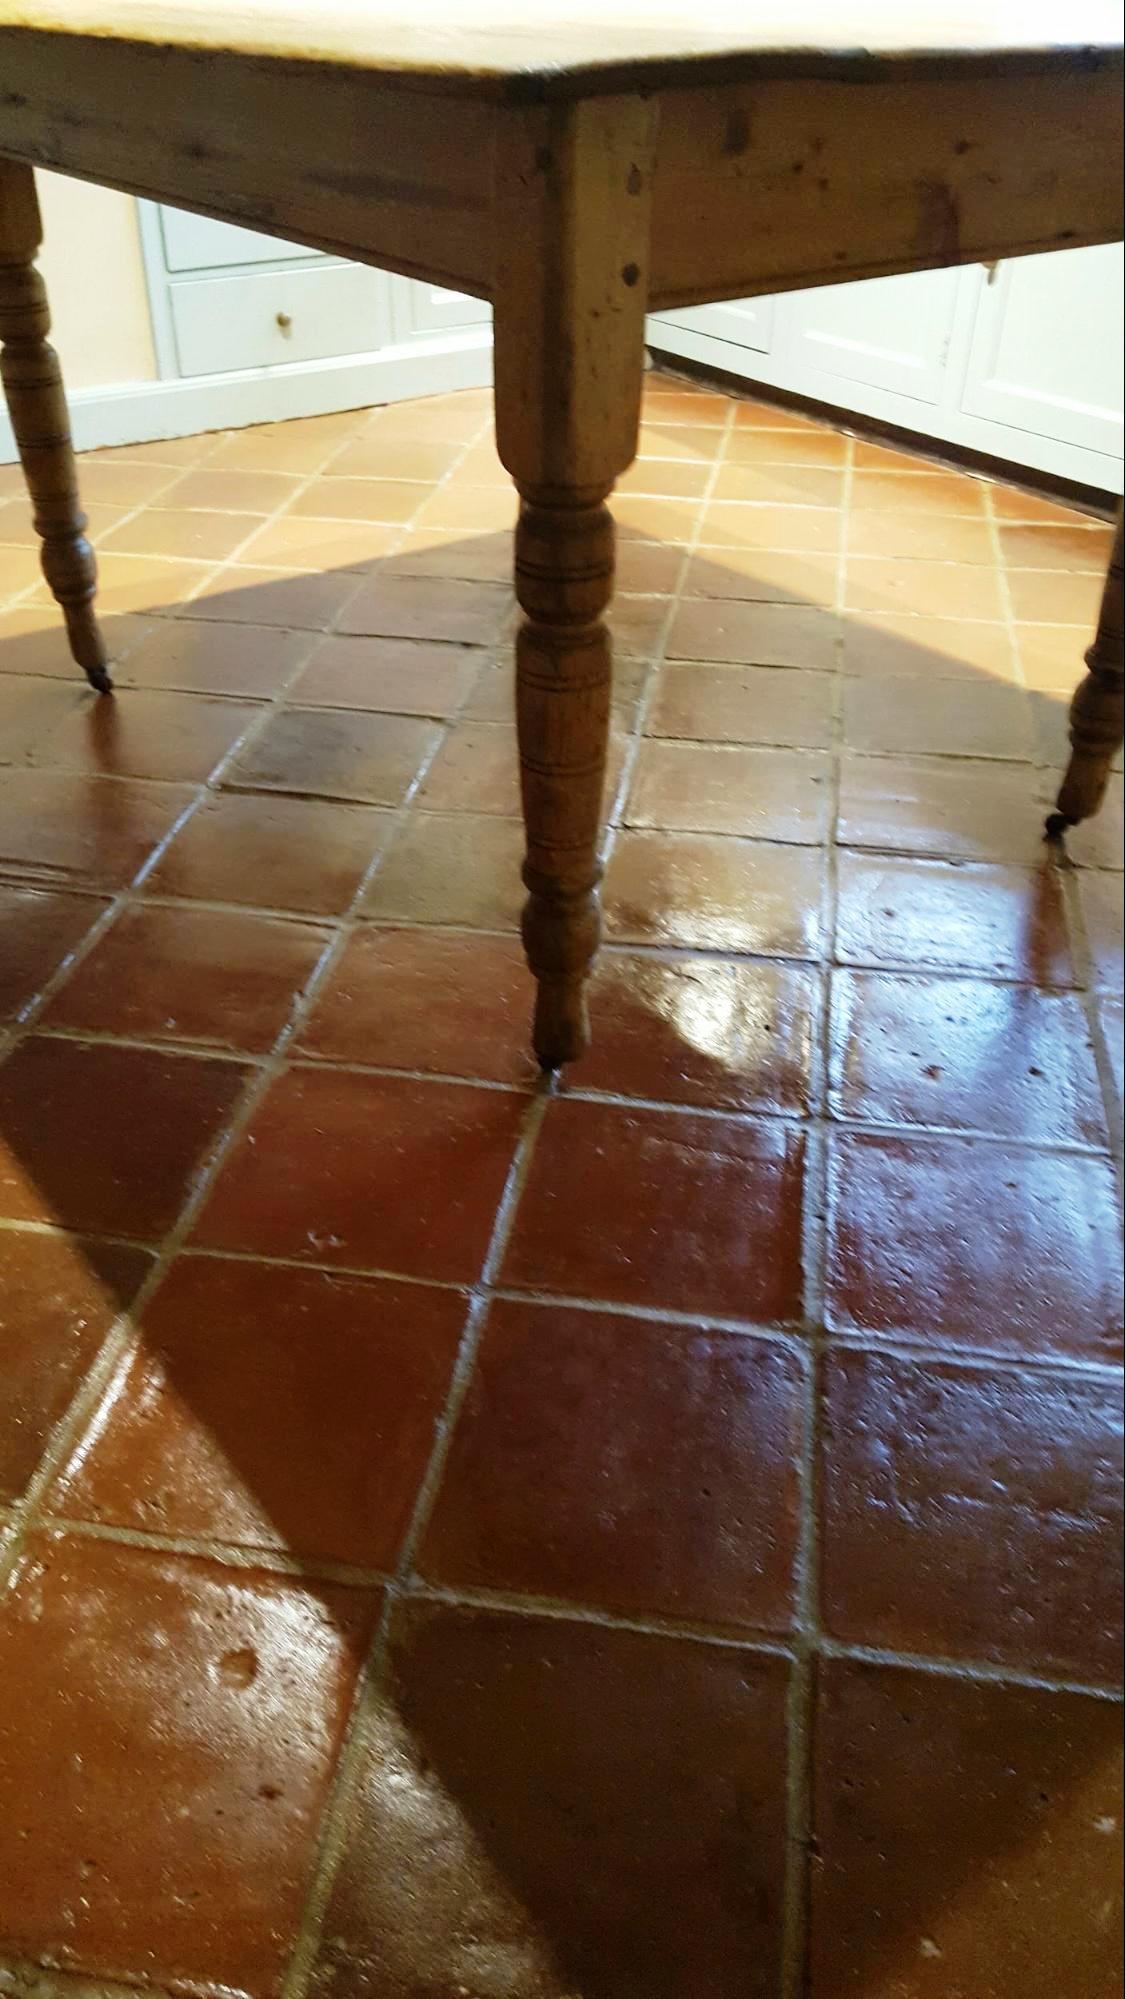
Old Terracotta Kitchen Floor Before Cleaning Runcorn

Deep Cleaning a Terracotta Tiled Kitchen Floor

To clean the floor, I soaked the floor in a strong dilution of Tile Doctor Remove and Go which is a strong stripping and cleaning solution which removes sealers and also draws out ingrained stains and also the heavy grease build up that was present around the cooker.

After twenty to thirty minutes the solution was worked into the tiles using a black scrubbing pad fitted to a rotary machine. The soiled solution was then removed with a wet vacuum and this was followed by scrubbing the grout lines with more Remove and Go and a grout brush until they were clean. The whole floor was then rinsed with water to remove any soil and trace of cleaning product. The water was then extracted using the wet vacuum. The floor was then checked to make sure it was as clean as it could be and stubborn areas spot treated.

Once I was happy the floor was clean it became apparent that some of the grout was loose and would need replacing so I took care of that using a matching grout before calling it a day and leaving the floor to dry out overnight.

Sealing a Terracotta Tiled Kitchen Floor

We returned next morning and tested the tiles with a damp meter making sure it was dry before we could seal it. To seal the floor, I used Tile Doctor Seal and Go which adds a nice sheen to the tiles and works really well on Terracotta.

Old Terracotta Kitchen Floor After Cleaning Runcorn

I took some time to complete though as due to the porosity of the clay it required eight coats to fully seal the tiles. You have to wait between coats to allow them to dry however I was able to speed up the drying process though using an air blower.


Restoring an Old Terracotta Tiled Kitchen Floor in Cheshire

Cleaning an Old Terracotta Tiled Kitchen Floor in Runcorn Read More »

=================================

Merseyside Tile Doctor
================================= Read More »

Scroll to Top